
Choose an engraving technique by choosing the result first: a cut line in metal, a dark mark on a smooth surface, contrasting lettering through a coating, a pressed impression, or an added color image. Several processes can put the same initials on a bracelet, but they change its surface in different ways.
Key facts
- No engraving method is simply the best. “Laser” names a family of tools and “black lettering” an appearance; neither tells you the depth or how long it will last.
- Stripping a coating with a laser exposes the layer beneath, but that color doesn’t mean the letters are cut deep into the base metal.
- Diamond drag uses a nonrotating diamond tip to score a line, but rotating diamond tools also exist, so diamond engraving needs clarification.
- Raised print is still print. Being able to feel the letters doesn’t make them embossed.
- On an ID plate, the room for lettering can be smaller than the plate, because borders or openings take up space.
Start with the exact part that will carry the inscription. Lettering on a bare metal nameplate is a different choice from lettering on a coated clasp or a leather strap. Once you know the part and its finish, you can compare methods without relying on labels like “premium engraving.” The personalized bracelet guides cover choosing the message and design.
Which kind of mark do you want?
Think about how the inscription should look when you wear the bracelet: quiet lines that catch the light, letters in strong contrast, or a textured impression. A close-up photo can help you pick a look, but it can’t reliably tell you which process made a mark.
The table below sorts the methods by what they physically do to the surface. The linked names lead to technical descriptions of each process, not to recommended engraving services.
| Process | Details to compare |
|---|---|
| Hand-cut engraving | Surface change: A person guides a graver to cut the decoration. The tool’s shape helps determine the line or texture. Choice: Look at comparable lettering by the engraver, including its line character and spacing. |
| Rotary cutting | Surface change: A rotating cutter removes material to form the inscription. Choice: Judge the cut and finished surface on a comparable component, not the machine name. |
| Diamond-drag or scribing | Surface change: A nonrotating diamond tip scores a line. Rotating diamond tools also exist, so “diamond engraving” needs clarification. Choice: Decide whether the offered line has the visibility and character you want. |
| Laser engraving by material removal | Surface change: The laser removes material, leaving a recess. Choice: Ask which layer will be removed and what the exposed surface will look like. |
| Laser annealing or color marking | Surface change: Heat changes the surface color rather than cutting a groove. Choice: Choose the contrast using an example of the specific finish and process. |
| Laser coating removal | Surface change: The laser removes a surface layer to reveal a different-looking layer beneath. Choice: Make sure that exposed color is what you want. It doesn’t mean the letters are cut deep into the base metal. |
| Electrochemical marking or etching | Surface change: An electrical and chemical process on conductive metal can create a color mark or remove surface material. Choice: Clarify which of those changes the offered process produces on your piece. |
| Impact stamping | Surface change: A shaped stamp impresses characters or a design by force, rather than tracing a cut line. Choice: Consider the impressed style and whether the component can accept that operation. |
| Pressure-formed embossing or debossing | Surface change: Pressure forms the design. Horween defines leather embossing as a relief pattern; sellers also offer recessed lettering under related labels. Choice: Look for an example showing whether the lettering is raised, recessed or otherwise finished. |
| UV printing | Surface change: Ink is deposited and cured. Layers of ink can create texture without cutting the bracelet. Choice: Choose it as a printed finish, with care information for that ink and surface. |
| Color filling | Surface change: A colored filler is added to an existing inscription to create contrast. Choice: Separate the underlying inscription from the added finish and its care needs. |
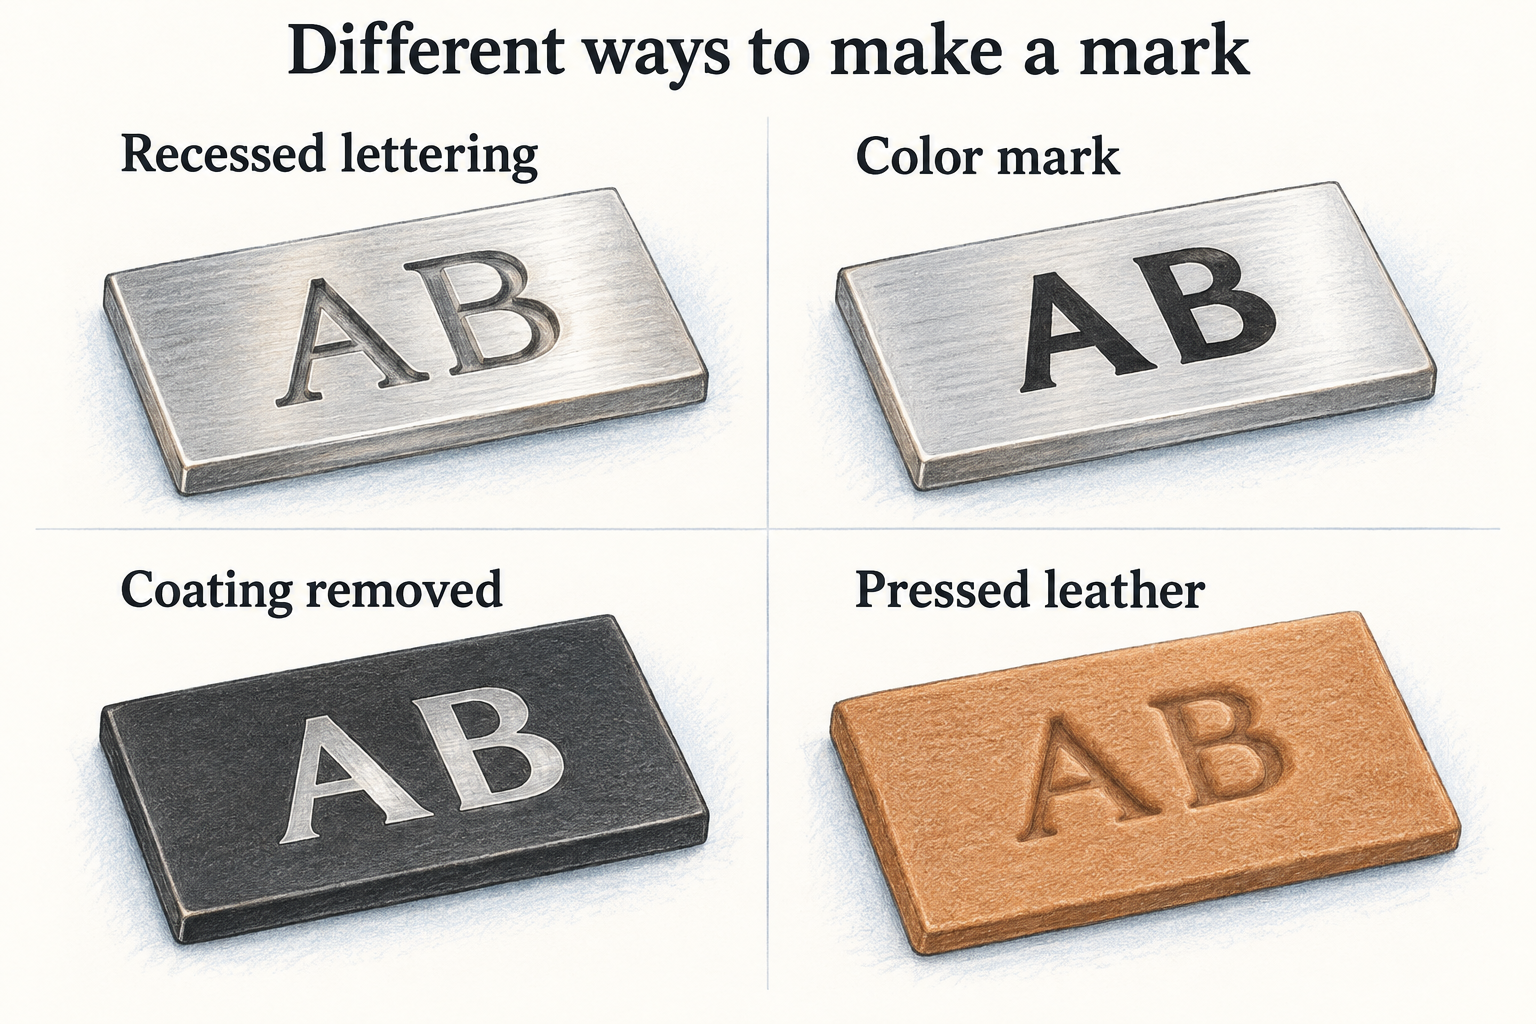
None of these is simply better than the others. A neatly scored date can suit one bracelet better than a bold filled inscription. “Laser” describes a family of tools and “black lettering” describes a look; neither tells you the depth, which materials it suits or how long it will last. “Etching” means different things in different contexts, so ask what actually happens to the surface. Compare laser engraving and marking or hand, diamond-drag and rotary engraving for a closer look at those methods.
Choose the component before the method
Start with a specific location: the front of an ID plate, the inside of a cuff, a panel on a clasp, or the leather itself. Then find out its material and finish. “Gold-tone” describes a color; it doesn’t tell you what layers are underneath.
The completed bracelet matters too. Curvature, seams, attached bands and the need to hold the piece can limit access to an otherwise suitable surface. The guide to what can and cannot be engraved covers whether your piece can take a given method. Liking an effect doesn’t mean every bracelet can have it.
For an ID bracelet with a nameplate, note two sizes: the plate itself and the area that can actually take lettering. A border, an opening or existing decoration can leave less room than the overall dimensions suggest.
Four ways this changes a bracelet decision
A bare metal ID plate
Suppose you want initials that remain visually quiet on a polished plate. Compare examples of a scribed line and a cut inscription in similar lighting. If you prefer strong contrast, compare the offered color-marking or filled option instead. Go by the look you like at normal viewing distance, not by which sample looks biggest in a close-up.
A gold-tone coated clasp
Here the coating is part of the design. If a process exposes a different-colored layer, the letters can become a deliberate contrast. If you want the gold color to carry through the lettering, that same effect would be a disappointment. Find out what the layers actually are before you choose a method; “gold-tone” alone doesn’t answer that. The guide to engraving layered and hollow bracelets develops that construction check.
A message inside a cuff
Start with which way the words should face when you take the cuff off to read them. Then look at the available height and curve. A process that looks good on a flat sample still needs a way to reach and hold the inside surface. Keep a private message short enough to read comfortably. For the access and holding assessment, see curved bracelets, plates and clasp panels.
A leather strap with a metal fitting
Choose which part should carry the meaning. Pressed lettering in the leather makes the inscription part of the strap’s texture; wording on an approved metal fitting gives it a separate surface. Those are two different looks, not two versions of “engraved leather.” The engraver still has to check that the leather’s finish and construction suit the process. Compare lettering in leather with embossing and metal fittings if you are choosing between those looks.
Let the artwork and the finish work together
Choose the words before you fill the space. The guide to names, dates and coordinates helps with the format, while what to engrave on a bracelet focuses on finding the message.
A typed name, a handwritten note and a detailed drawing are different artwork jobs. A method that can reproduce your design still has to do it at a size you can read. Check the lettering or artwork at actual size, then use a finished sample to judge contrast and shine. A layout proof shows placement, not the finished surface.
Be clear about any added color. A filled groove, a heat-produced color mark and printed ink can all give contrast, but they’re different finishes and may need different care. The guide to engraving wear and care follows what those differences mean when an inscription changes.
Turn the choice into one clear brief
You don’t need to know machine settings. Give the engraver a brief that covers the bracelet, the artwork and the result you want:
- The object: material and finish information, with photographs of the complete bracelet and the intended component.
- The location: the exact side or panel, usable area and reading direction.
- The design: final wording or supplied artwork, including punctuation and any details that must be retained.
- The effect: a cut line, color mark, exposed layer, impression or printed image, supported by a representative finished example.
- What you agree: the process and finish, the approved proof, care instructions, and what happens if there’s a mistake or the piece needs refinishing later.
For example, “a discreet date on the inside of this cuff, with no added color” communicates more than “standard engraving.” The engraver can then tell you whether that works on your piece. The custom bracelet ordering guide covers the rest of the order.